As I had to redo my front chrome badge due to an accident with some superglue (covered later in this post) I thought I would take some more photos of the process to help anyone who is considering this. As a quick recap, the Abarth badges from the Grande Punto Abarth fit with some minor modification to the back of the badges. The part numbers are: 735495890 and 735495891 and these are readily available from UK sellers via eBay if you are based in the US. Each badge costs around $22 plus postage via eBay although you may find them for a lower price via other means.
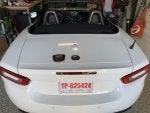
If you are not stopping to take photos then the rear badge takes about 5 minutes to remove the old one and replace with the new one and is very straight forward. The front badge takes a little bit longer, perhaps 5 minutes to remove the old badge and another 5 minutes to modify the new one and then 5 minutes to fit it.
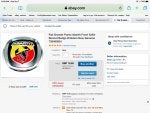
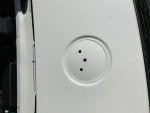
To remove the old front badge use a Flexible Extension Screwdriver Bit adaptor such as this:
Enhanced Edition Flexible Extension Screwdriver Drill Bit Kit Adaptor w/Magnetic Connect Drive Shaft Tip | 1/4 in Power drill adapter + 1/4 in Extender Extend Drill Bit+Drill Bit Recept - - Amazon.com . Using a flashlight look through the front bumper grill and you will see the 10mm nut that holds the badge in place. Credit to Murat for suggesting this approach which removes any need to cut the bumper lining.
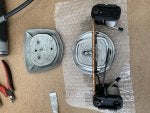
In comparing the badges you can see the new chrome badge is smaller.
On the reverse side they both have 2 legs and a bolt.
Unfortunately Fiat decided to have the legs at slightly different offsets...
So the legs are slightly too narrow to fit in the holes on the bumper
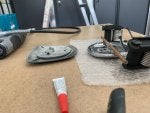
I've found using a Flex Shaft on a Dremel, plus some cutting pliers/snips makes the next part of the exercise quick and easy.
Firstly we want to modify the legs so that they align with the holes - therefore we cut away the inner parts
Let's check how that fits - the legs fit in the holes, but the badge is prevented from lying flat due to the curve in the bumper and the rear of the badge protrusions.
Let's do some more cutting:
And see how it fits. Unfortunately while it is better, the rear of the badge that holds the bolt in place is contacting the curve of the bumper.
So a bit more surgery. In this last bit we cut away the support for the bolt. This means we either no longer use the bolt and just attach the badge with some strong double sided tape, or we need to glue the bolt to the badge (see later).
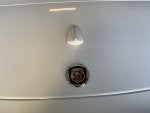
And now the badge fits:
This is how the back of the badge looks:
In this photo you can see the stamped metal of the front of the badge is visible
Don't do what I did the first time which is put liquid superglue in the gap where you want to glue the bolt to as it will flow through and onto the front of the badge, thereby destroying it. Find a thicker glue that is more of a paste and you will be fine.
JBWeld (similar to Araldite in the UK) which is more of a paste.
First badge damaged with liquid super glue
So either use tape, or glue the bolt and after it dries you can reattach the badge using the Flexible Screwdriver Bit and the 10mm nut from the old badge you removed.
Enjoy!
TheSalamander